Posts

Glow in the Dark Can Cozy

Image
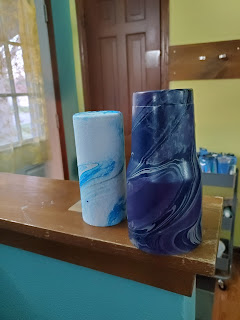
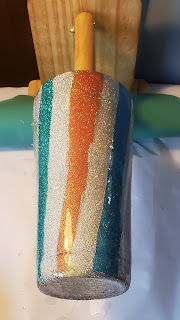
  Life has been soooo busy.  Several years ago I moved home to help family.  This meant moving into my parents basement.  It's cool and dry and I can have bookshelves has far as the eye can see...though my mom keeps threatening me about the basement sinking because of all of the books but I think I need way more than 2500 that I currently have spaced out throughout the basement.  I was pretty ok with how it was but I definitely wanted a bathroom downstairs so I wouldn't have to run upstairs for a shower or toilet.  Long story short between starting a new job two months ago we also started on construction of the basement which is why posts have been few and far between.  Having a walk in closet and bathroom great but when doing a lot of the stuff yourself not so much.  That and I am highly allergic to dust and trees so yeah my body is trying to kill me with the construction. On to the fun things in life.  I've been playing with craft techniques again.  Some have been a huge

Knitting Supplies

Image
     When your sisters talk you into doing another summit but this time on Knitting that means pulling out all of your supplies and raiding other peoples yarn to get together everything you need for the videos.  After everything is together you end up with the chaotic mess you have to figure out.  Here are some things you will need to know before you start a project Yarn:  I buy for projects and not just pretties.  I know other people like to have a massive stash of yarn and no shade to those people but when it comes to limited space I need it for my books.  I gravitate to the bulky yarn as it works up faster and is easier on my hands.  Arthritis sucks and the smaller the yarn the harder on the hands it is.  You can pick up almost any yarn to work with any project.  There are some patterns that will work better with certain weights but you can usually modify the pattern to work with your yarn.   Yarn Weight Common Names Stitches per inch Recommended

Marble Tumbler

Image
  One of the other new I've tried lately is using Marble Ink  to create some AMAZING designs. You can combine several methods to get some amazing cups including glitter and vinyl.  I have a hard time covering up the marbling that is on the cups to do more. To start this project I picked up a big 5 gallon bucket from Home Depot for the water.  Fill it about half full with water.  Get your colors together that you want to marble with.  There is a very short time you can throw the ink in the water before in congeals.  I randomly dump ink in the bucket and layer the colors always ending with the first color.  You will also need to have some tool to pull the the ink to the sides.   When you go in to dip you want to twist the cup as you dunk it.  When done you'll need to skim the left over ink to the side.  I usually grab a random piece of cardboard.  You will want to be careful as the marble ink will stain. I started with the glitter cups and then marbled them like I did the other o

Combining Fabric and Paper Tumblers

Image
 In addition to the paper method I wanted to combine it with fabric.  I have family who adore Harry Potter.  I found some amazing fabric at Joann Fabric. My plan was to just do some all fabric tumblers for myself and other family but as I was putting it together I had the brilliant idea to combine the fabric with paper.  I took a HP book and destroyed it.  As a lover of books it hurt my heart but it turned out amazing.  I did go and burn the edges of the page to create a look.  I am pretty clumsy so I do this in the bathroom over the sink so if something happened then I had ample water to put out.    You can see in this picture the edges of the paper are more ragged and have a small burned look to it.  I think it adds so much to the cover by doing it this way.  I made sure the paper overlapped the fabric so you wouldn't have a line.  You could opt for more fabric or pages.  It would be whatever works for you.  I also included different HP themed glitter to fill in some of the white

Paper Tumblers

Image
 I've been seeing videos of tumblers using paper to create custom tumblers.  I didn't know how this would work out.  Surprisingly it went very well and was pretty easy.  I could see sprucing them up even more. Here is one where I took some scrap paper and used modpodge to glue to the cup.  All you need to do is wrap the paper around the tumbler and make sure it goes completely around the cup to get the look.  I added glitter to it but I could see adding vinyl to the cup as well.   It turned out amazing and I will be experimenting with this later.  There are just somethings you can't get without something premade so this is definitely a way to get special cups that are unique.  I could even see printing your own pictures and gluing them on.  You would want to be careful to make sure the epoxy won't bleed through your paper but that is an experiment for another day.

Busy crafting

Image
 I've been absent for a bit because life has been crazy.  Started a new job that curtails my crafting time which sucks but the cats appreciate the kibble.  I've also been experimenting with different kinds of cups.  First up is using Paper with tumblers but you will be getting to see a bit of each new method of doing different things with tumblers. In addition to new methods I've been using new products and I am promoting them as they are fabulous. New Epoxy I LOVE this epoxy.  There is literally no smell to it.  It goes on smooth and for the most part beyond user error there isn't any micro bubbles in the epoxy to drive me crazy after I finish a project. Glitter I started with the cheap glitter from Walmart and it works.  I can blend them to different colors and they turn out beautifully.  With that I am becoming a bit of a snob over glitter.  There are three companies that I adore to buy glitter from.  Even when there was issues and my packages were literal glitter bo

Striped Glitter Cup

Image
I was looking to make a new style of cup to design and I found a sampling of a striped cup.  There are two different methods to do this.  This post is the first method.  I'll show the second method later.  You will need a tumbler that isn't tapered.  The one I used for this method were  Built  and  Ozark Trail  (older version) from Walmart.  The Ozark Trail cup has a slight taper but nothing major.  The Built ones were completely straight.   Tumbler A -  I taped up my cup with some painters tape to begin with.  Any painters tape will work.  I tried angled lines, straight up and down, and around the whole cup.  Each had there pluses and minuses.  None of the lines were perfect which irritates me quite a bit.  The people they were for don't care they just like the designs.   Tumbler B - Circle Once taped up I picked a primary color to use for each of the open spaces.  For tumbler A it was silver and for B and C it was black. For Tumbler A I used Mod Podge for the glue.  I ran